Project #8.1: Downdating the Guest Bath: Installing a faucet and the Alape Bucket Sink
Prior to installing the shiplap on the west wall of the bathroom, I needed to install the sink. I had removed the teetering pedestal sink entirely, and we chose a wall-mounted sink that was lightweight, arguably period-appropriate, and fun: the Alape Bucket Sink from Rejuvenation. I'm a big fan of Rejuvenation's products. It can be quite expensive though, so I always wait for a sale.
Before installing the sink, I needed to choose a faucet and install it. Our old sink had the faucet integrated into it, so I needed to prep the area for a new faucet. A wall mounted faucet would normally have been my first choice, but there is a window above our sink, so that was not an option. Thankfully, someone had insulated and framed out the walls to cover the concrete block foundation of the church, which created a space for plumbing and a handy shelf behind our soon-to-be wall mounted sink.
Installing a faucet is a fairly simple plumbing task. Even if you've never done it before, I encourage you to try. Its really just a matter of following instructions, not being afraid to ask questions at the hardware store, and expecting to make more than one trip for any and all plumbing projects you attempt. Of course, that does not mean that the job I'm am about to recount went smoothly. Uh uh.
Turning Off the Water & Replacing the Valves
The first order of business, which is turn the water off, proved to be a challenge. The water shutoff valve for the church turns like an outdoor spigot, so I closed it and went in the house. Despite giving it time to empty, water was coming in from somewhere. So I turned off the water connecting the hot water heaters. Nothing. Still an annoying dribble. Undeterred, I redirected the "dribble" to the copper pipe near the toilet, which I had disconnected. By redirected, I mean that if I opened up the valve over there and let it drain into a bucket, no water would run at the sink. Good enough for me.
I digress here.....to tell you that I eventually did get the water to turn off completely. In old houses (and churches apparently) the shut-off valve at the house only does part of the job. In the end, I had to shut off the water at the street in order to completely stop the flow of water. If you have a turn-valve like ours, rather than a vertical shut-off valve, you will almost certainly have to turn off the water at the street too. Of course, before I figured that out, I put a bucket under the toilet supply line and just let it flow while I worked on the sink. If you have an eager six-year old, they will stand there and continue to empty it when it gets too full. Digression over.
After the water was mostly turned off, I planned to remove and replace the valves on both the toilet and the sink. They were old and rusting. Removing them was a cinch, but that's not all there is. There is the compression sleeve, aka the ferrule. And not just any ferrule, but one that is so tight on the copper piping that no tool will remove it. After frustrating searches online and two trips to the hardware store, I was finally able to remove them. Ferrule removal is ALL about having the right tool, and I wouldn't bother attempting without it. The best tool IMHO is a ferrule remover sleeve made by English Tool Company. However, for some strange reason I do not understand, it is only available for ordering online. I have a suspicion that hardware stores do not carry because of the cost...its an expensive little bugger. But its worth having and worth the wait. I have one and I love it. If you just can't wait the few days it takes to arrive in the mail, the second best tool is a faucet handle puller, which is pictured below, cheaper, and available in any hardware store.
Eventually when I did remove the ferrule, I replaced the old fixture with a Shark Bite brand valve. They are pricier than regular valves, but they can easily be taken on and off using a special tool and do not use compression sleeves. Knowing I may need to remove the valves to install the ship lap, the Shark Bite was a perfect choice.


Installing the Faucet & the Sink
After drilling a hole in the counter for the faucet and fitting the faucet in, I reached underneath to carefully secure it in place with a unique looking piece of hardware that came with it. At this point, I am reaching into the wall cavity that extends below the floor, because like I mentioned the floor was raised and there is a space where the plumbing runs. So I knew I had to be careful not to....crap....yes, I dropped the hardware. And there it was...out of reach...on the concrete floor down down down below. See that little out of focus moon-shaped thing? Argh!

I tried a number of things, but I could not reach it and eventually, I accidentally pushed it out of view. Ugh. However, there are some real benefits when you are doing work on your own house--you can destroy things when you need to, because you know you can fix them. My solution: Drill a hole in the floor, so I could shine a flashlight under the floor and see the hardware and let out my frustrations by hammering out a bunch of drywall at the base of the floor, where I could stick my arm down to retrieve it. Notwithstanding the drywall scrapes up my arm and the swearing, it worked out fine. Hardware retrieved!


With that tragedy averted, I moved forward with the project. After securing the faucet, I pulled out the old insulation and replaced it. I sealed up the hole with the existing plastic sheeting that I had carefully cut to reach the supply lines. Then I taped it closed, leaving the the hot and cold water supply lines out. I used the greatest-thing-since-duct-tape (zip-ties) to keep them out of my way while I continued installing the shiplap.
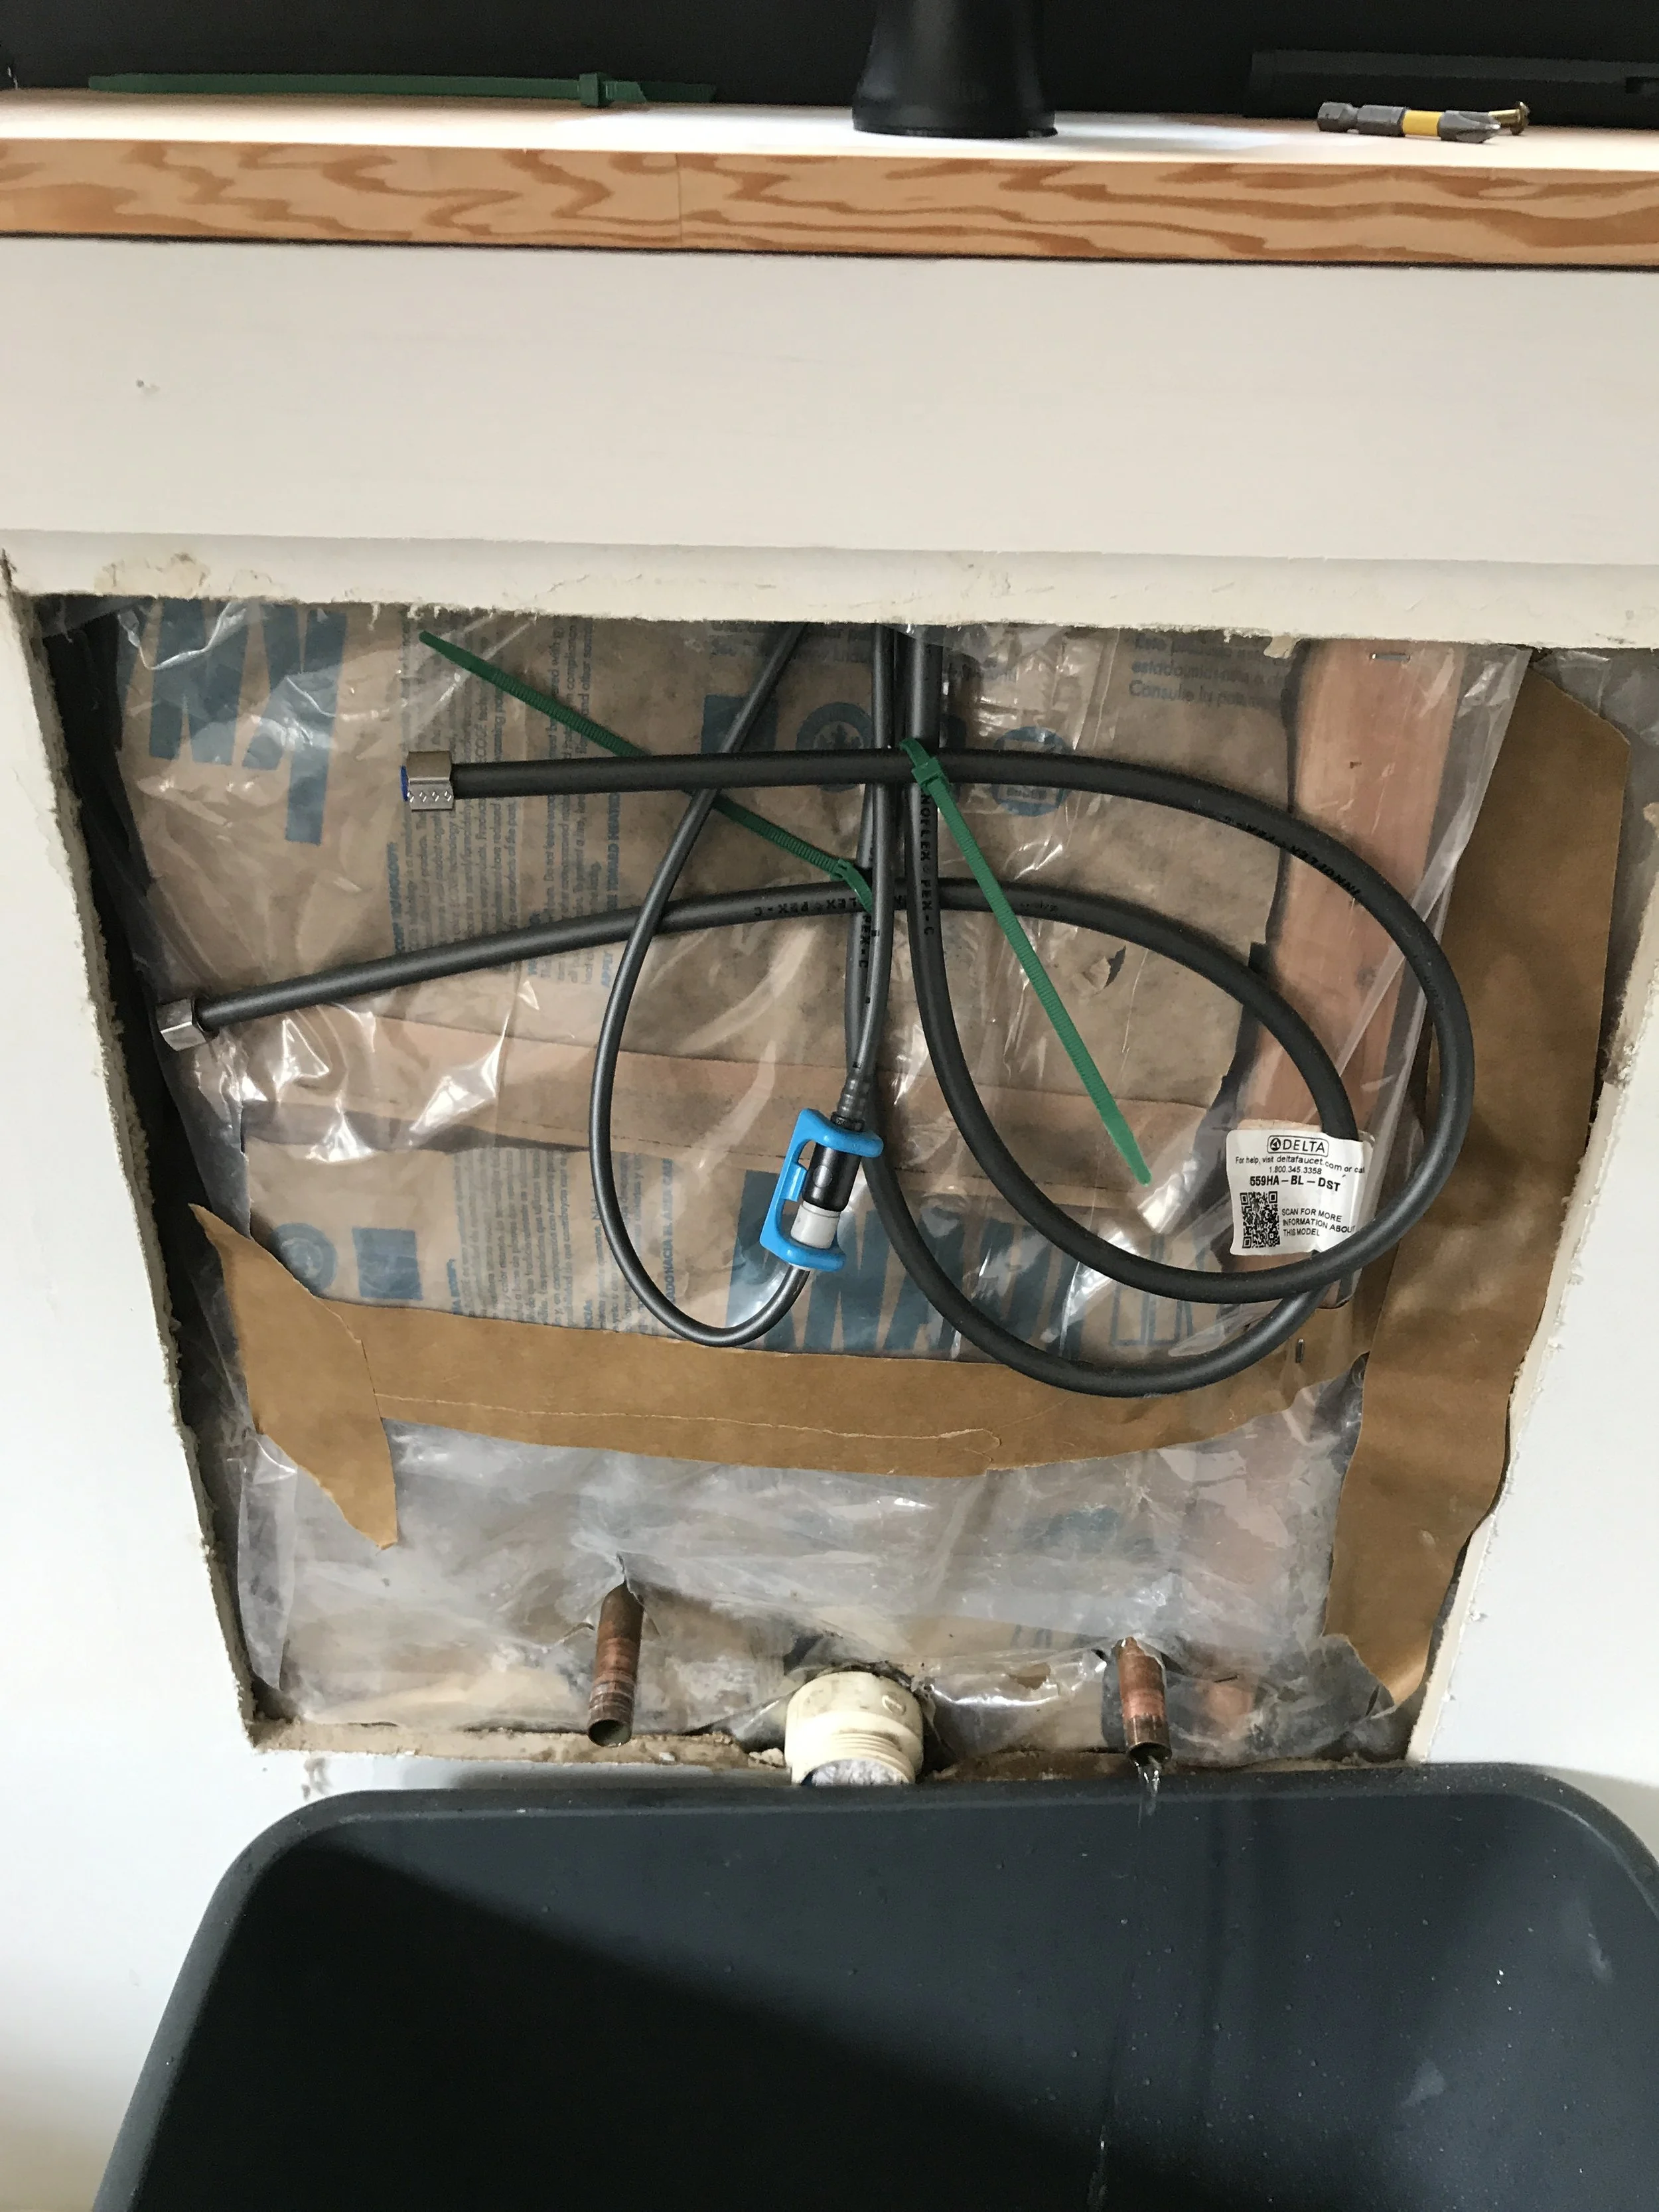

I installed the shiplap on that wall and bored a single hole for the supply lines. The hole, as well as those two large gaps in the shiplap that you see in the picture, won't be visible because they are covered by the sink.


